
Refine operations (Pro feature)
Refine lets you orient the model and set its scale using GPS coordinates or distances measured on the subject.
Refine operations are available exclusively for Pro users.
What are Refine operations?
A reconstruction may have a different orientation, scale or position from the one you need. Refine uses your references to adjust them: GPS for georeferencing and known distances for scale.
You can use them for:
- Drone surveys that require georeferenced output
- Architectural documentation tied to geographic coordinates
- Models that need to be accurately placed in real-world maps or GIS systems
- Any workflow where real-world scale and position matter
Accessing the Refine tab
Open Refine to add an operation.

Available operations
1. Zzname0zz (Beta)
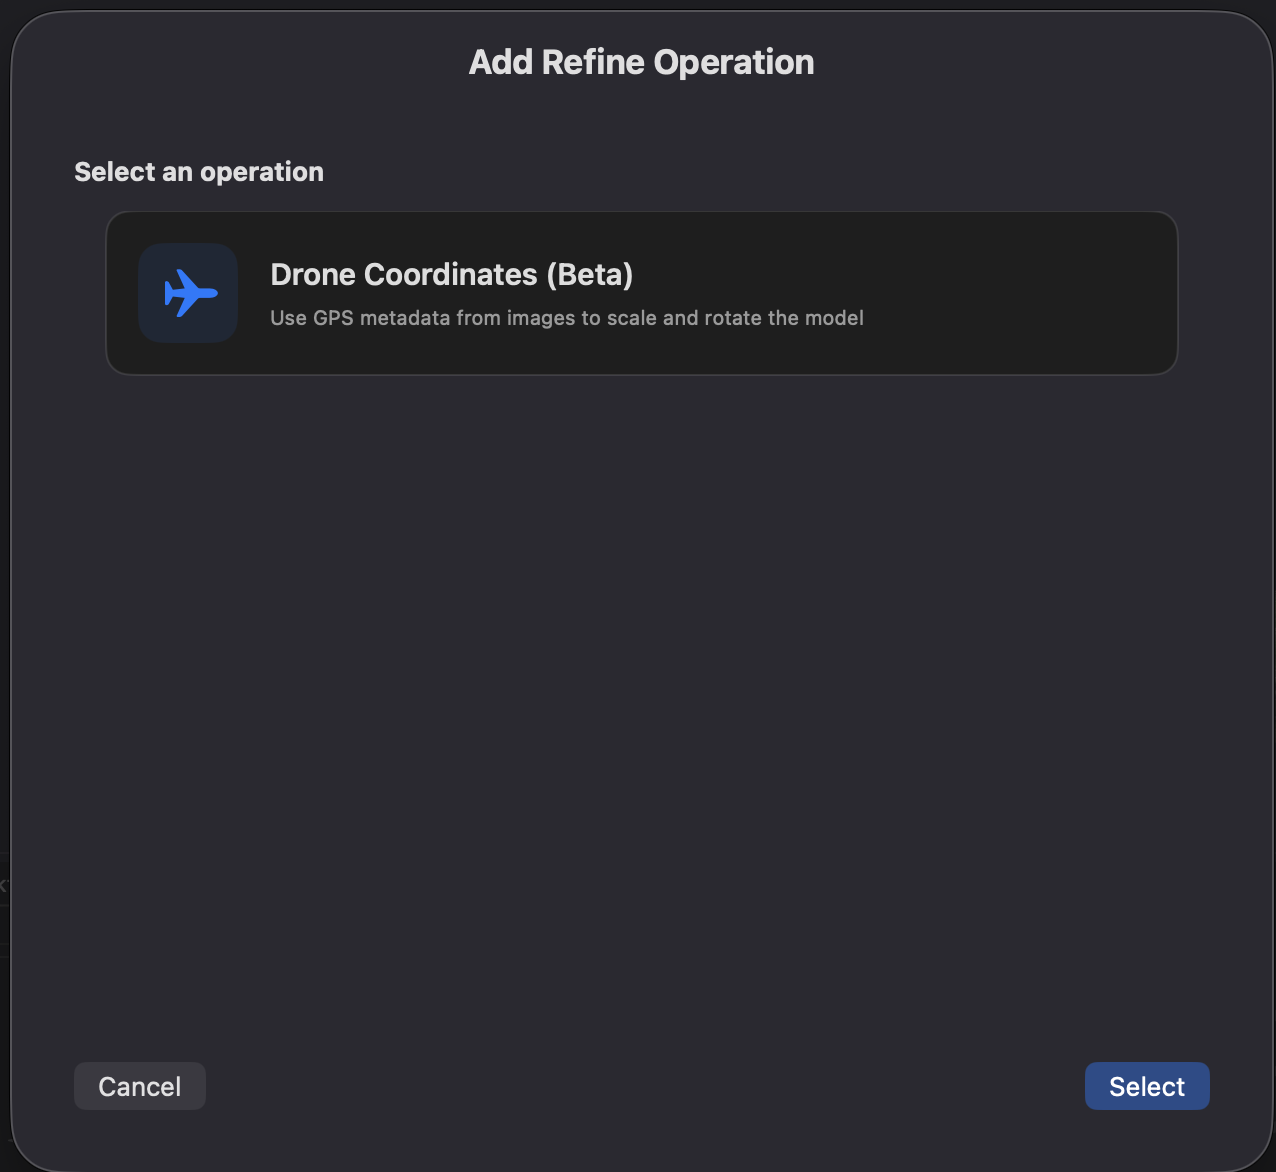
Automatically align, rotate, and scale your 3D model using GPS metadata embedded in your dataset images. This operation reads the geographic coordinates recorded by the drone at the time of each shot and uses them as reference to correctly transform the model in real-world space.
Drone Coordinates is in Beta. Its result depends on GPS accuracy and image quality. Check the model before using it for work that needs reliable measurements.
Requirements:
- Images in the dataset must contain GPS metadata (EXIF geolocation data)
- GPS data is typically embedded automatically by drones and GPS-enabled cameras
How it works:
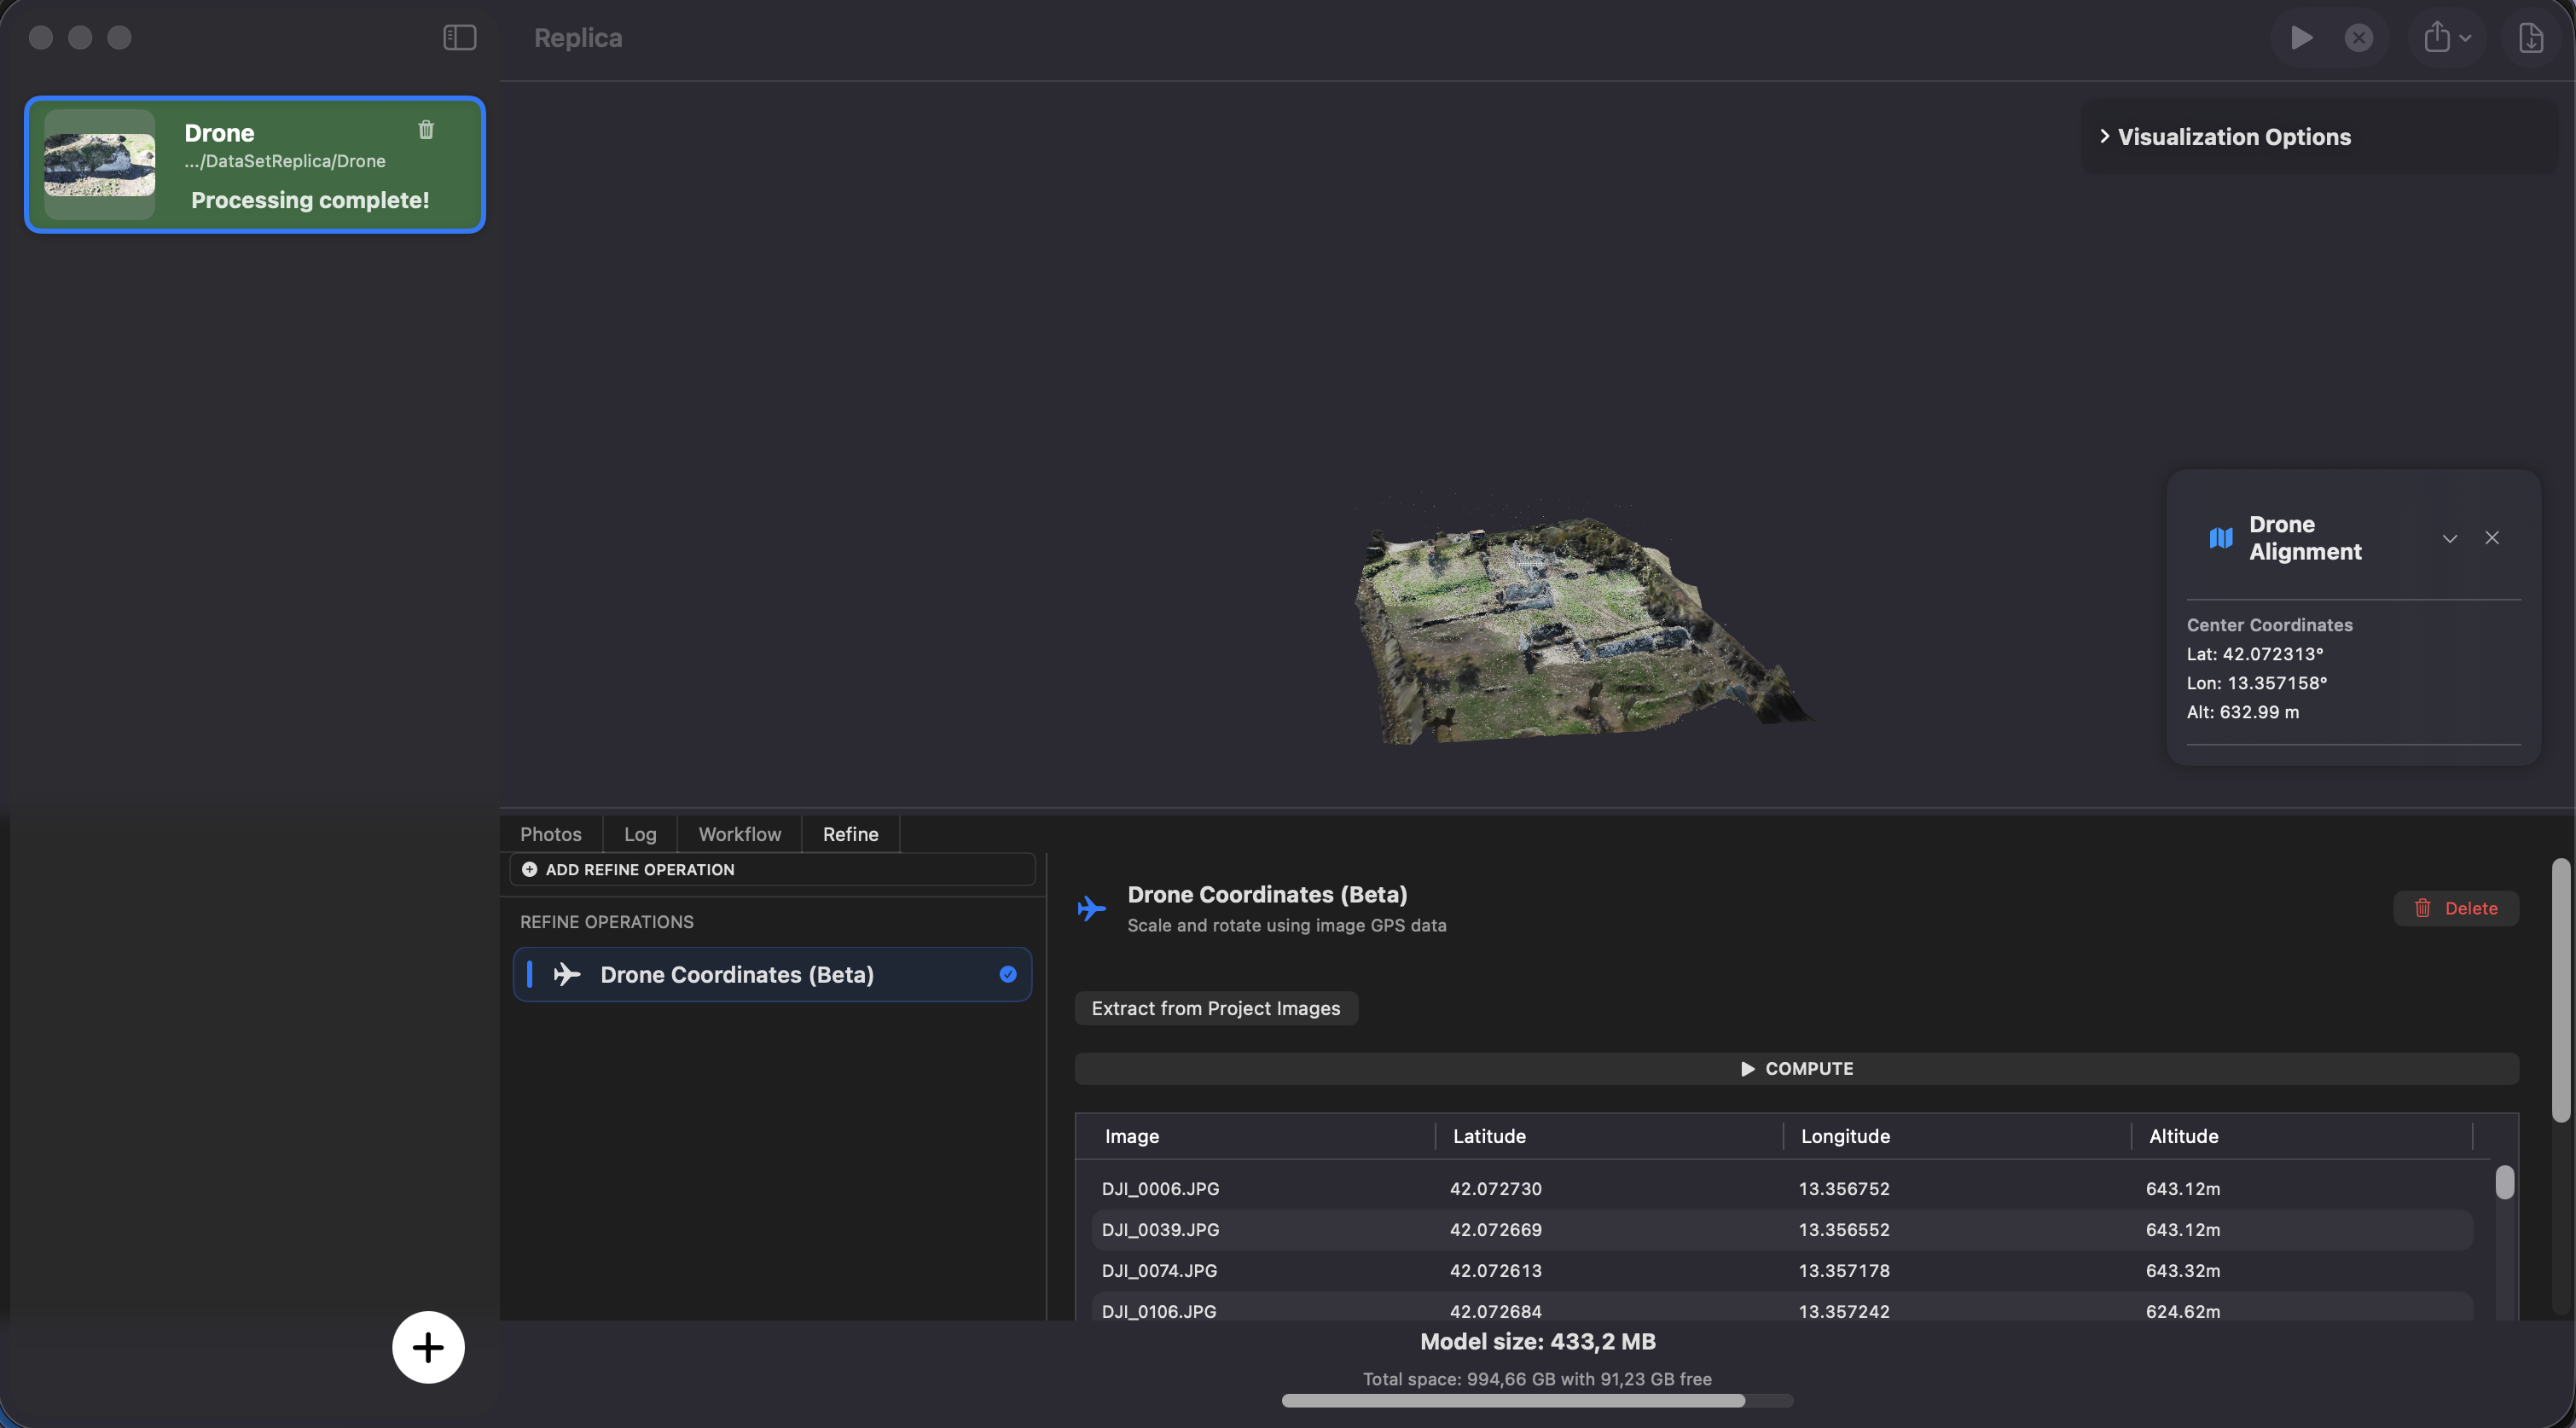
Step 1: extract GPS data
Click the Extract from Project Images button.
Replica scans all images in your project, extracts the embedded GPS coordinates, and displays them in a table. Each row in the table corresponds to one image with its latitude, longitude, and altitude values.
Check the coordinates in the table. If it is empty or the values look wrong, inspect the original images' GPS metadata before continuing.
Step 2: compute transformation
Once you have reviewed the GPS data, click the Compute button.
Replica calculates the transformation needed to align the model with the GPS reference frame and applies:
- Translation: moves the model to the correct geographic position
- Rotation: orients the model to match the real-world heading
- Scale: adjusts the model size to match real-world distances derived from GPS positions
Step 3: review the result
After the computation completes, a panel displays the geographic center of the model (latitude, longitude, and altitude). This confirms that the model has been successfully georeferenced.
Configuration options:
- None: the operation works automatically based on the GPS data extracted from images
Use cases:
- Drone surveys of terrain, buildings, or infrastructure
- Creating georeferenced models for GIS integration
- Architectural documentation with real-world positioning
- Volume calculations and measurements on correctly scaled models
For best results, capture images with a drone or camera that records accurate GPS coordinates. RTK (Real-Time Kinematic) drones provide centimeter-level accuracy, which yields the most precise transformations.
Best practices
Ensuring good GPS data quality
Use a GPS-enabled drone or camera:
- Consumer drones (DJI, Autel) automatically embed GPS in image EXIF data
- RTK drones provide higher accuracy for professional workflows
- Verify GPS logging is enabled before your flight
Plan your flight for good GPS coverage:
- Fly in open areas with clear sky visibility for better GPS signal
- Avoid flying near tall buildings or under canopies that block GPS signals
- Overlap your flight path sufficiently for good image coverage
Check your images before processing:
- Use a tool like ExifTool or a photo viewer to verify GPS metadata is present
- Ensure coordinates look plausible for your capture location
- Remove images with missing or clearly incorrect GPS data
Combining Refine with workflows
You can use Drone Coordinates in combination with Workflows for a complete automated pipeline:
Example: Drone Survey Pipeline:
1. Run photogrammetry session
2. Apply Drone Coordinates (Refine tab) → georeferenced model
3. Apply Export Model (Workflow tab) → export as OBJ or GLB
Order matters: Apply Drone Coordinates before exporting so that the exported file includes the correct georeferencing transformations.
Troubleshooting
No GPS data found (empty table):
- Verify that your images contain GPS metadata using an EXIF viewer
- Check that GPS was enabled on your drone or camera during the flight
- Some image editing or conversion tools strip EXIF metadata: use original files
GPS data looks incorrect:
- Ensure the images are from the correct flight session
- Check for time zone or coordinate system inconsistencies
- Try removing outlier images with clearly wrong coordinates
Computation result seems inaccurate:
- The accuracy depends on the quality of the embedded GPS data
- Consumer drone GPS accuracy is typically 1-5 meters; RTK provides centimeter accuracy
- Verify the geographic center shown in the result panel matches the expected location
- Remember this is a beta feature: results may not be perfect in all scenarios
Scale seems off after computation:
- Ensure images were captured at consistent altitudes
- GPS-based scale estimation works best when images cover a large enough area
- For high-accuracy scale requirements, consider using Scale by Camera Distance from the Workflows tab as an alternative or complement
2. Zzname0zz
Use Measure & Scale to set scale from a measured distance on the subject. You can also level the model on the horizontal plane. It works for indoor captures and small objects where you have no GPS data but can measure a reference.
How it works:
Choose two points in the viewer and enter their actual distance. One pair gives Replica a uniform scale; with several pairs it fits a scale by least squares to reduce the effect of placement errors. You can also add a vertical pair: Replica aligns it with the Y axis and moves the model until the ground point sits at Y = 0.
Requirements:
- A completed photogrammetry session
- At least one real-world distance you can measure on the subject (e.g., the length of an A4 sheet, a book spine, a printed marker)
Tip: prepare your reference distances before capturing photos. Place a measured object (an A4 sheet, a ruler, a book) inside the scene so that it appears in your dataset images: you will use it later as the measurement reference.
Step 1: add a measurement pair
Click the Add measurement button to create a new measurement pair. Each pair consists of:
- Point A: first point on the model
- Point B: second point on the model
- Real (m): the real-world distance between A and B, in meters
Click Point A to enter placement mode, then click on the 3D model where the first reference point is located. Repeat with Point B. Yellow markers appear on the model at the points you placed.
Once both points are placed, Replica shows the measured (model-space) distance next to the pair. Type the real distance in meters into the Real (m) field (decimals separated by a dot or comma both work).
Tip: use multiple pairs for better accuracy: add 2-3 measurement pairs covering different parts of the model. The least-squares solver will use all of them simultaneously, producing a more robust scale estimate than a single measurement.
If you misplace a point, click the small x next to the A ✓ or B ✓ button to clear just that point and place it again. To remove an entire measurement pair, click the red trash icon next to the pair name.
Step 2: (optional) add a vertical reference
If your subject has a clear vertical edge (a wall corner, a pole, the spine of a book standing upright), use it as a vertical reference to automatically level the model.
Click Ground point and click on the floor or base of the subject. Click Top point and click on a point that is directly above the ground point: they should both lie along a real-world vertical line. Cyan markers appear at these positions, and a small fixed orange arrow at the origin indicates the world-up direction so you can see what Replica is targeting.
Step 3: apply
Click APPLY (scale + level). Replica:
- Computes the best-fit scale from all valid measurement pairs
- (If vertical reference is set) computes the rotation that aligns ground→top with world Y
- (If vertical reference is set) translates the model so the ground point sits at Y = 0
- Applies all three transformations in a single rigid transform
The model in the viewer updates immediately. The markers follow the transformed model, so you can verify visually that the measurements still make sense.
Configuration options:
- Number of measurement pairs: free, more pairs = more robust scale
- Vertical reference: optional, enables levelling and grounding
Use cases:
- Indoor photogrammetry where GPS is unavailable
- Small object capture (statues, products, archaeological finds)
- Architectural details where a printed reference of known size is included in the scene
- Any dataset where you want metric accuracy without relying on GPS
Tip: for the cleanest results, choose reference distances that are as long as possible and well-spread across the model. A single 30 cm measurement on one corner of a 2 m model is less accurate than two 1 m measurements spanning the whole scene.
AprilTag Scale Bar (Beta)
From v1.4.1, Pro can use an AprilTag bar to set the scale. An L bar also levels the model. Replica finds tag36h11 IDs automatically and lets you choose centres in the viewer. Import the bar's JSON or enter dimensions manually; actual print measurements take precedence over nominal values.
AprilTag Scale Bar explains how to capture the bar, measure it and choose the tags.
Refine and exported scale
Mesh and PLY exports keep the scale and orientation shown in the viewer. Replica uses the current Refine transform without adding earlier transforms again. USD for VFX keeps the cameras aligned too. Check the result before exporting; the transform is already applied when you open the file in another application.
Free and Lite can also change scale with the manual gizmos. Measure & Scale and AprilTag require Pro. Check units in the destination application after import, especially for STL, which does not specify them.
Removing a Refine operation
When you click the Delete button on a Refine operation, Replica:
- Removes the operation from the list
- Resets the 3D viewer to the original, pre-refine model
- Cancels the applied state of all other Refine operations (you will need to re-compute them if you want their effect back)
After Delete, the viewer and subsequent exports start from the same state. Leave operations in the list if you want to retain them: Delete also clears the applied state of the other operations.
Next steps
Other guides in the manual:
- Getting Started - Learn the basics of creating photogrammetry projects
- Session configuration: choose quality, textures and memory use.
- Workflows (Pro) - Automate post-processing with scale, alignment, and export operations
Need help?
For help with Refine, ask in the Replica community and describe the reference you used and the transform you applied.
Include the log if the calculation stops.