Image to STL in 2026: Every Method Compared
Search "image to STL" and you get a tool soup. Some sites turn a JPG into a printable relief in thirty seconds. Others promise a full 3D mesh from a single photo. Photogrammetry tools want a hundred photos. They are not the same thing, and the wrong tool for your job will waste your filament.
This guide untangles the four real methods behind that search query, what each one actually produces, and how to pick the one that matches what you're trying to print.
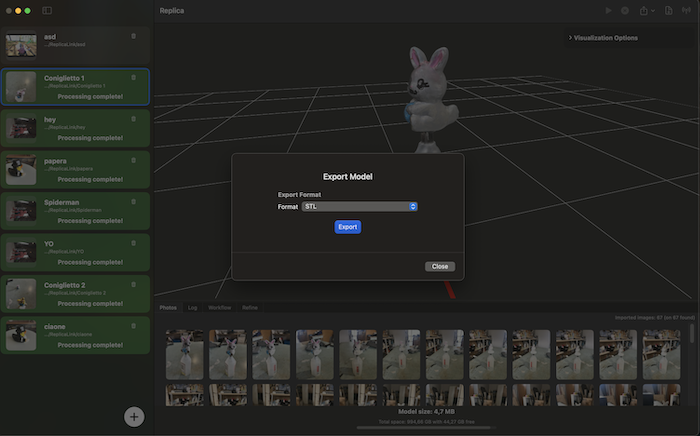 A photogrammetry reconstruction exported as a watertight STL, ready to slice.
The Four Methods Hiding Behind "Image to STL"
Different tools mean very different things by the same phrase.
- Heightmap conversion — reads the brightness of each pixel as elevation. White = high, black = low. Output is a 2.5D relief, not a true 3D shape. Lithophane generators work this way.
- Single-image AI generation — feeds one photo to a diffusion model that guesses what the back and sides look like. Output is a full mesh in under a minute.
- Multi-image AI generation — same idea, but with three to five reference photos. Inference is constrained, so the guesses are tighter.
- Photogrammetry — captures 40 to 100+ overlapping photos around a real object and reconstructs measurable geometry from triangulation. Slower, but the geometry is real.
If you confuse these four, you'll be disappointed. Treat them as separate tools for separate problems.
Method 1: Heightmap to STL (the Lithophane Path)
You upload a JPG or PNG. The tool maps brightness to height and extrudes a flat plate where each pixel becomes a column. The result is a relief — gorgeous when backlit, but it is not a 3D version of the object in the photo.
Best for: lithophanes, terrain from elevation maps, decorative reliefs, signage, embossed logos.
Not for: anything that needs a closed shape with a back side, undercuts, or measurable dimensions.
Realistic limitations: the front face is the photo. The back is flat. Fine details disappear because pixel noise translates directly into geometry noise — most generators apply smoothing, which softens micro-detail anyway. For best lithophane results, print vertically, use 100% infill, and stick with white PLA for clean light diffusion.
If your search was "I have a photo of my cat and I want to print her on a backlit panel", this is your method. If you wanted a tiny statue of the cat, keep reading.
Method 2: Single-Image AI Generation
This is what most "AI 3D model from photo" tools do. Tripo, Meshy, Rodin, Hunyuan and similar services take one image and use multi-view diffusion to hallucinate the unseen sides. The mesh comes back in seconds.
Best for: game assets, concept props, backgrounds, hobbyist figures where exact geometry doesn't matter, fast iteration.
Not for: measurable replicas, scanned products, archival work, anything where the back has to match the real object.
Realistic limitations: independent benchmarks put single-image inference accuracy in the 80–90% range for "standard" objects. That number drops fast when the input is occluded, skewed, or unusual. The model invents the parts of the object it cannot see — sometimes plausibly, sometimes not. Tripo and Meshy have improved print-readiness specifically (Meshy reports a 97% slicer pass rate on figurines, Tripo auto-repairs non-manifold geometry before export), so the printability is real even when the fidelity is approximate.
The honest framing: you're not scanning, you're generating. The output is "an object that looks like the photo from the front." If that's what you want, this is the fastest path on the planet.
Method 3: Multi-Image AI Generation
Same architecture as Method 2, but conditioned on three to five photos instead of one. Less invention, more inference. Some tools blur the line between this and lightweight photogrammetry.
Best for: when you have a few photos but not a full capture set, or the object is hard to walk around.
Not for: the same things photogrammetry doesn't do well — reflective surfaces, transparent objects, dimensional accuracy.
Realistic limitations: more photos help, but the model is still guessing. Multi-view inconsistency is the well-documented failure mode — different views push the diffusion model in different directions and the mesh splits the difference, often with surface artefacts in the merged regions.
Method 4: Photogrammetry — the One That Measures
Photogrammetry is the only method that produces real, measured geometry. The software finds matching features across dozens of overlapping photos, triangulates each point in 3D space, and rebuilds the surface from the resulting point cloud. There is no inference. If a part of the surface appears in at least three photos, it ends up in the mesh; if it doesn't, you get a hole.
Best for: product replicas, archival scans of artefacts, museum digitisation, parts you need to fit other parts, anything you want to print at 1:1.
Not for: "I have one photo and want a model in thirty seconds." This is the wrong tool for that job — see Method 2.
Realistic limitations: you need 40–100+ photos with 60–80% overlap, processing takes minutes (not seconds), and reflective or featureless surfaces require matte spray. In return, you get geometry you can measure.
Replica is built around this method on macOS — local processing, USDZ by default, OBJ/FBX/GLB via Blender integration, and direct STL export for printing through the from-photos-to-3D-print workflow.
Decision Framework
A quick map for the next time you search "image to STL".
| What you have | What you want | Use |
|---|---|---|
| One photo | A backlit relief or lithophane | Heightmap converter |
| One photo | A decorative figure, fast | Single-image AI (Tripo, Meshy) |
| 3–5 photos | An approximate model of something hard to capture fully | Multi-image AI |
| 40–100+ photos | A measurable, printable replica of a real object | Photogrammetry (Replica) |
| A drawing or sketch | A 3D version of the drawing | Single-image AI with prompt guidance |
| A painting | A relief or art reproduction | Heightmap (relief) or single-image AI (figure) |
The fastest route is rarely the most accurate one. The most accurate route is rarely the fastest. Pick the trade-off that matches the print on the other end.
Where Replica Fits
Replica is a native macOS photogrammetry app — it covers Method 4 specifically. The free version processes up to 50 images per project, which is enough for small to medium objects scanned with the iPhone-only workflow. The Pro version unlocks unlimited images, configuration presets, and automated workflows that scale, align, and export your model in one pass — useful when you're producing a batch of STLs for printing rather than one-offs.
Replica won't generate a model from a single photo. That's intentional. If you need real geometry, photos plural are the input. If one photo is all you have, the AI tools above are the right answer — just don't ship the result to a CNC.
Closing Perspective
"Image to STL" hides a real engineering question behind a friendly search phrase: how much of the geometry do you need to be true? Lithophanes need none — the photo is the geometry. AI generators need approximately none — the model invents what's missing. Photogrammetry needs all of it, which is why it's slower and why the result is the only one you can call a scan.
Match the method to the answer, not to the speed.
Try the Workflows
- Photogrammetry to STL: download Replica and try the from-photos-to-3D-print guide with a free dataset
- Practice datasets: Easter Bunnies (small object) and Appian Tomb (architectural element) — both captured with the photo-only method described above
Questions? Email us at info@ambiensvr.com.