Session Configuration
This guide covers all the configuration options available when setting up a photogrammetry session in Replica. Understanding these settings will help you balance quality, processing time, and output requirements for your specific needs.
Accessing Configuration Settings
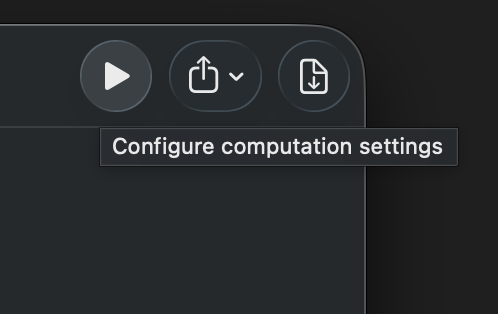
When you're ready to start a reconstruction, click the Play button on your selected project. This opens the session configuration panel where you can adjust all settings before processing begins.
Configuration Presets (Pro Feature) 🌟
Before diving into individual settings, Pro users can take advantage of Configuration Presets to quickly apply commonly used settings.
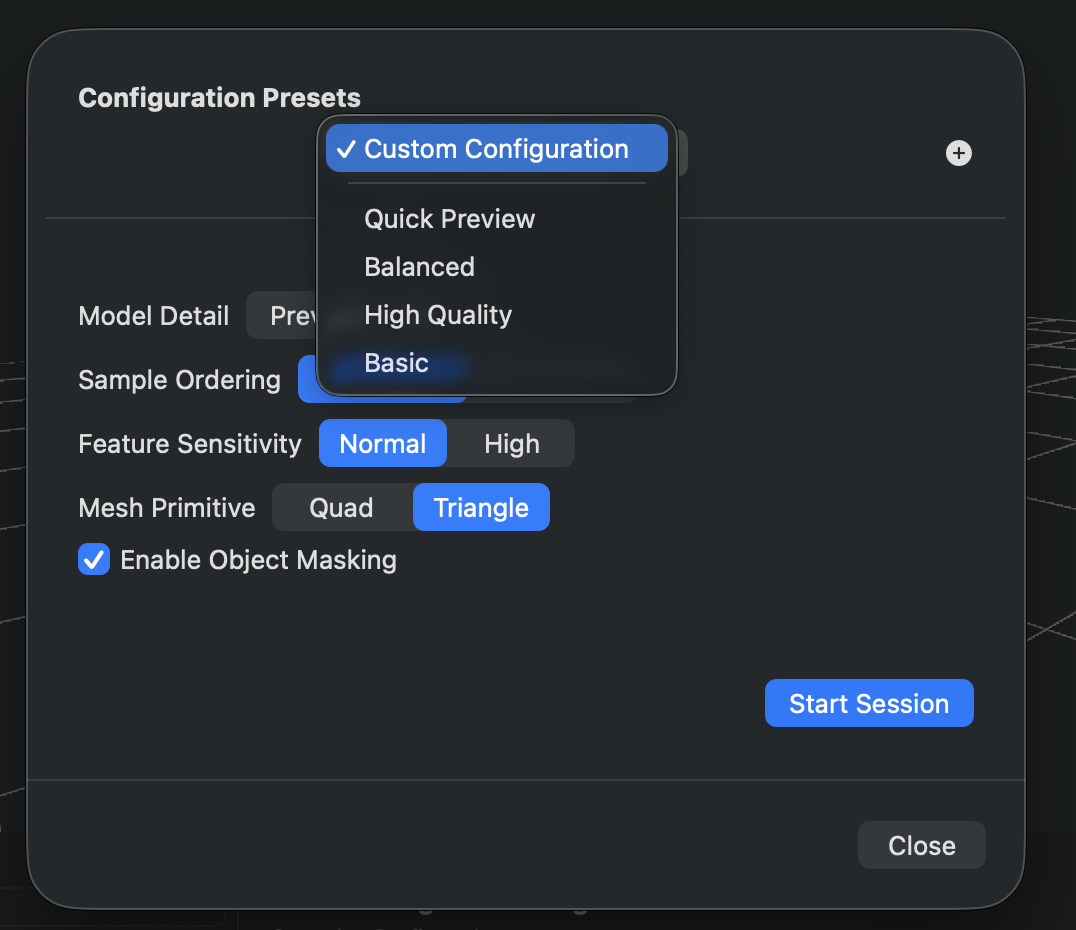
Built-in Presets
Replica includes three default presets ready to use:
| Preset | Best For | Settings |
|---|---|---|
| Quick Preview | Fast preview to verify capture quality | Preview detail with standard settings |
| Balanced | General-purpose reconstruction | Medium detail with standard settings |
| High Quality | Production-ready models | Full detail, sequential ordering, high sensitivity, quad primitives, object masking enabled |
Managing Your Presets
To apply a preset:
- Select it from the "Configuration Presets" dropdown menu
To save a new preset:
- Configure your desired settings
- Click the
+button next to the preset selector - Enter a name for your preset
- Click Save
To delete a preset:
- Select the preset and click the trash icon
Tip: Create presets for different project types you work with regularly. For example, you might have one for "Product Photography" and another for "Architecture Models."
Model Detail
The Model Detail setting is the primary control for output quality and processing time. It determines the overall fidelity of your reconstructed 3D model.
| Detail Level | Processing Speed | Quality | Best For |
|---|---|---|---|
| Preview | Fastest | Lowest | Quick verification of camera coverage and capture quality |
| Reduced | Fast | Low | Draft models, mobile app content, quick iterations |
| Medium | Moderate | Good | General-purpose models, web applications |
| Full | Slow | High | Production models, detailed visualization |
| Raw | Slowest | Highest | Maximum detail preservation, research projects |
| Custom | Varies | User-defined | Advanced users with specific technical requirements |
When to Use Each Level
Preview & Reduced:
- Testing your photo set before committing to a long reconstruction
- Creating lightweight models for mobile devices or web viewers
- When time is more critical than quality
Medium:
- Most 3D models for general use
- When you need a balance between quality and processing time
- Models that will be viewed on desktop applications
Full & Raw:
- Final production assets
- Models requiring maximum detail capture
- When quality is the top priority and you have time to wait
- Creating models for close-up viewing or high-resolution rendering
Custom:
- When you have specific polygon count or texture requirements
- Advanced workflows with particular technical constraints
- Fine-tuning for optimal file size vs. quality trade-offs
Custom Detail Specification
When you select Custom as your Model Detail level, additional fine-grained controls appear that let you precisely define your output specifications.
Maximum Polygon Count
Define the upper limit for mesh complexity.
- Default: 250,000 polygons
- Type: Numeric value
- Impact: Higher values create more detailed geometry but increase file size and processing time
Consider this: A model with 100,000 polygons is suitable for most real-time applications, while 500,000+ polygons might be needed for high-detail visualization or animation projects.
Maximum Texture Dimension
Controls the resolution of texture maps applied to your model.
| Resolution | Size | Recommended For |
|---|---|---|
| 1K | 1024 × 1024 | Mobile devices, low-detail objects |
| 2K | 2048 × 2048 | Web applications, standard quality |
| 4K | 4096 × 4096 | Desktop applications, good detail |
| 8K | 8192 × 8192 | High-quality production work (default) |
| 16K | 16384 × 16384 | Ultra-high-resolution requirements, large objects |
Tip: Texture resolution should match your intended viewing distance. Objects viewed from far away don't need 16K textures, while objects meant for close inspection benefit from higher resolutions.
Texture Format
Choose between lossless and compressed texture output.
PNG (Lossless)
- No compression artifacts
- Maximum quality
- Larger file sizes
- Best for: Production work, archival purposes, further processing
JPEG (Lossy)
- Adjustable compression quality (0.0 to 1.0)
- Smaller file sizes
- Quality vs. size trade-off
- Best for: Web delivery, when file size matters
JPEG Compression Quality Scale:
0.0= Maximum compression (smallest files, lowest quality)0.5= Moderate compression (balanced)0.8-0.9= Light compression (great quality, reasonable size) (recommended)1.0= Minimum compression (highest quality, larger files)
Output Texture Maps
Select which texture map types to generate. Each map serves a specific purpose in rendering and visualization.
| Texture Map | Purpose | When to Use |
|---|---|---|
| Ambient Occlusion | Simulates soft shadows in crevices and corners | Adds depth and realism to models |
| Diffuse Color | Base color information of the surface | Always needed for standard visualization |
| Displacement | Height map encoding fine surface detail | Creating geometric detail without extra polygons |
| Normal | Surface normal directions for lighting | Simulating detailed lighting on surfaces |
| Roughness | Surface roughness/glossiness properties | Controlling material reflectivity and appearance |
Quick Selection Options:
- All: Generates all five texture map types (default for maximum flexibility)
- Custom: Toggle individual maps based on your specific needs
Save processing time: If you only need basic visualization, select just Diffuse Color and Normal maps. The other maps are primarily useful for advanced rendering in 3D applications.
Sample Ordering
This setting tells Replica how your input images are organized, which affects how the reconstruction algorithm processes them.
| Option | How It Works | Best For |
|---|---|---|
| Unordered | Images processed without considering sequence | Photos taken from random positions around an object |
| Sequential | Images processed in the order they appear | Video frames, systematic photo sequences with planned camera paths |
When to use Sequential:
- Your images come from a video file
- You captured photos in a systematic pattern (e.g., walking around an object)
- Images are named in chronological order
When to use Unordered:
- Photos were taken from various random angles
- You mixed different shooting sessions
- Image order doesn't reflect spatial relationships
Tip: If you're unsure, Unordered is the safer choice. It works well for most scenarios, while Sequential can provide slightly better results when your images truly follow a logical sequence.
Feature Sensitivity
Controls how aggressively the reconstruction algorithm detects and matches features between images.
| Setting | Behavior | Processing Time | Best For |
|---|---|---|---|
| Normal | Standard feature detection | Faster | Most scenarios, objects with clear textures and features |
| High | Enhanced feature detection | Slower | Complex surfaces, fine details, subtle textures, challenging materials |
Use High sensitivity for:
- Objects with low contrast or subtle textures
- Reflective or transparent surfaces
- Fine geometric details you want to capture
- When Normal sensitivity produces incomplete results
Use Normal sensitivity for:
- Objects with good texture and clear features
- When processing speed is important
- Most typical photogrammetry subjects
Mesh Primitive
Determines the type of polygons used to construct your 3D mesh. This choice affects compatibility and workflow integration.
| Primitive | Description | Best For |
|---|---|---|
| Triangle | Standard 3-sided polygons | Game engines (Unity, Unreal), real-time rendering, maximum compatibility |
| Quad | 4-sided polygons | CAD software, subdivision modeling, animation, further refinement in 3D apps |
Choose Triangle if:
- Your model is destined for a game engine
- You need maximum compatibility across software
- The model will be used for real-time visualization
- You're exporting to web-based 3D viewers
Choose Quad if:
- You plan to edit or refine the mesh in Blender, Maya, or similar tools
- The model will be subdivided for higher detail
- You're creating assets for animation workflows
- The topology quality matters for further processing
Note: Most modern 3D software can handle both types, but triangles are more universally supported. When in doubt, choose Triangle.
Object Masking
Object Masking helps isolate your subject from the background during reconstruction, resulting in cleaner models with better-defined edges.
- Enabled: The reconstruction focuses on the primary subject, removing background elements
- Disabled: The entire scene is reconstructed, including background
Benefits of enabling Object Masking:
- Cleaner reconstruction with less background noise
- Better edge definition around your subject
- Reduced processing of irrelevant areas
- More accurate mesh boundaries
When to use Object Masking:
- Your subject is clearly distinct from the background
- You want to isolate a specific object
- Background contains distracting elements
- You're creating product models or isolated assets
When to disable Object Masking:
- You want to capture the entire environment
- The subject and background are equally important
- Creating architectural or landscape models
Important: Object Masking works best when there's good contrast between your subject and background. A clean, simple background (like a turntable) produces the best results.
Practical Configuration Examples
Here are some proven configurations for common scenarios:
Product Photography
Goal: Clean, high-quality model suitable for e-commerce or AR viewing
- Model Detail: Full
- Sample Ordering: Sequential (if shot on turntable)
- Feature Sensitivity: Normal
- Mesh Primitive: Triangle
- Object Masking: Enabled
- Texture: 4K JPEG (quality 0.9) or 8K PNG
Architectural Element
Goal: Detailed model for visualization in architectural software
- Model Detail: Full or Raw
- Sample Ordering: Unordered
- Feature Sensitivity: High
- Mesh Primitive: Quad
- Object Masking: Disabled
- Texture: 8K PNG with all texture maps
Web/Mobile 3D Viewer
Goal: Optimized model for web delivery with fast loading
- Model Detail: Custom
- Polygon Count: 50,000 - 100,000
- Texture Dimension: 2K or 4K
- Format: JPEG (quality 0.8)
- Maps: Diffuse Color + Normal only
- Sample Ordering: Unordered
- Feature Sensitivity: Normal
- Mesh Primitive: Triangle
- Object Masking: Enabled
Quick Preview Test
Goal: Fast verification of photo coverage before final reconstruction
- Model Detail: Preview or Reduced
- Sample Ordering: Unordered
- Feature Sensitivity: Normal
- Mesh Primitive: Triangle
- Object Masking: Disabled
Storage Requirements
Before starting a session, Replica automatically checks your available disk space. Higher quality settings require more storage during processing.
Approximate Storage Needs:
- Preview: < 1 GB
- Reduced: 1-3 GB
- Medium: 3-8 GB
- Full: 8-20 GB
- Raw: 20+ GB
- Custom: Varies based on polygon count and texture settings
The app will alert you if there isn't enough space available before processing begins.
Tip: Keep at least 20% of your disk free beyond the estimated requirement. Processing generates temporary files that need additional space.
Tips for Best Results
Start with a quick preview:
- Always run a Preview or Reduced quality reconstruction first
- Verify your photos have good coverage
- Check for any issues before committing to a long Full or Raw reconstruction
Match settings to your output:
- Don't use 16K textures if you're exporting for web viewing at 1080p
- Choose polygon counts appropriate for your target platform
- Consider your final delivery format when selecting texture formats
Experiment with presets:
- Pro users should create presets for their common workflows
- This saves time and ensures consistency across projects
- You can always fine-tune settings after applying a preset
Monitor processing time:
- Higher quality settings can take significantly longer
- Plan accordingly if you have deadlines
- Consider running overnight for Raw or high-polygon Custom reconstructions
Next Steps
Now that you understand all the configuration options:
-
Getting Started - Learn the basics of creating your first photogrammetry project
-
Workflows (Pro users only) - Discover how to automate post-processing operations
-
Refine Operations (Pro users only) - Apply precise georeferencing transformations to your model using GPS metadata from drone images
Need Help?
Visit the Replica community forums for support and tips from other users.
Happy reconstructing! 🎯