From Photos to 3D Print: Two Workflows with Replica
You have a real object. You want a 3D print of it. Replica gets you there — entirely on your Mac, no cloud processing required.
This guide covers two distinct paths: a quick workflow for single-color STL prints, and an advanced workflow for multicolor 3MF files using Chroma3MF, our Blender plugin built specifically for this pipeline.
Quick Workflow: Photos to STL
This is the fastest path from real object to print bed. No extra software needed.
1. Capture
Photograph the object from all angles. For best results:
- 40-80 photos for a medium-sized object
- Consistent, diffused lighting (avoid harsh shadows)
- Overlap each shot by at least 60%
- Move around the object, not the object itself
- Avoid reflective or transparent surfaces
A turntable helps, but hand-held works fine for most subjects. The key is coverage — make sure every surface is visible in at least 3 photos.
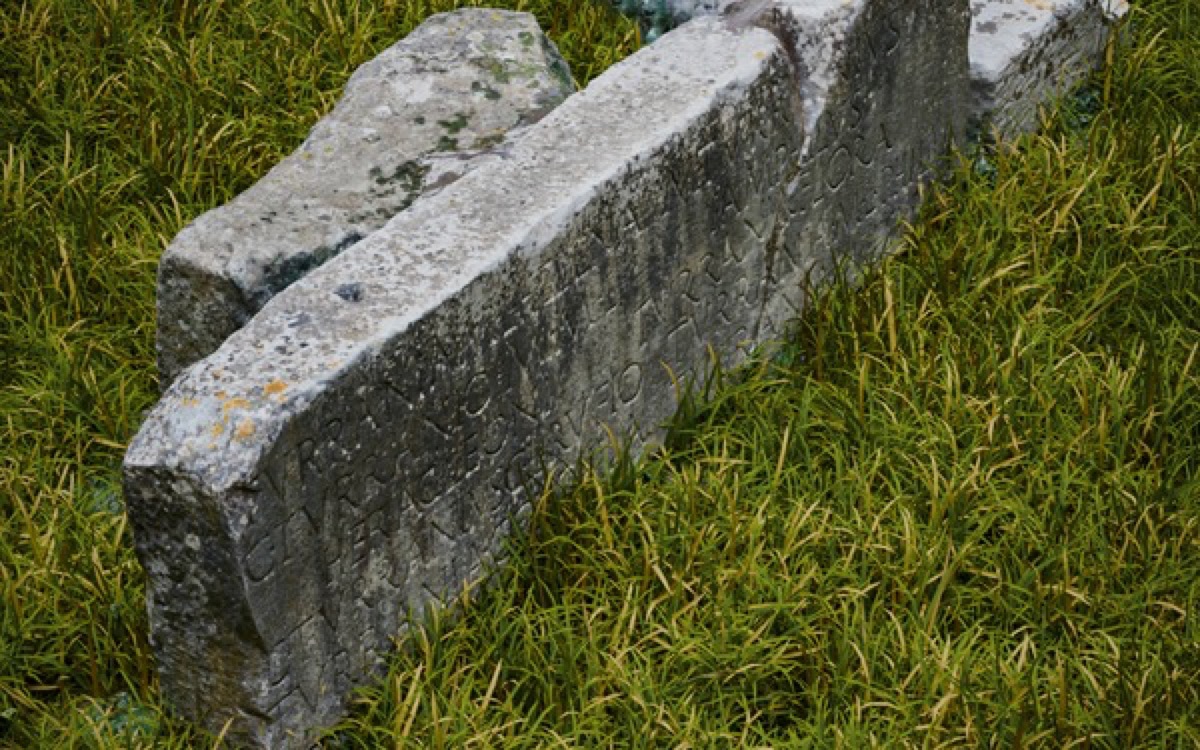
Want to see what a real capture set looks like? Download our free Appian Tomb dataset — 116 photos of a tomb on the Via Appia in Rome, plus the 3D model output from Replica.
2. Process in Replica
Import the photos into Replica and run the reconstruction:
- Import your image set — Replica reads EXIF metadata automatically
- Configure the session: set detail level to Medium or High depending on your target print resolution
- Enable Object Mask — this isolates the object from the background and generates a closed (watertight) mesh, ready for slicing
- Process — Replica handles alignment, dense reconstruction, and meshing locally on your Mac
- Monitor progress in real-time through the processing dashboard
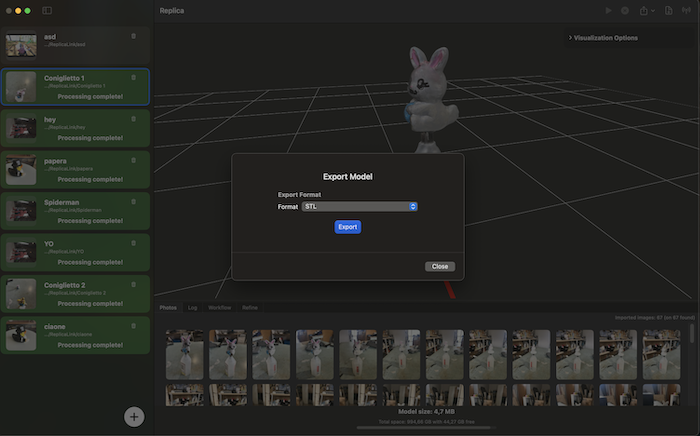
3. Export as STL
Once processing is complete:
- Open the Export panel
- Select OBJ or STL as the output format
4. Slice and Print
Open the exported STL in your slicer of choice (PrusaSlicer, OrcaSlicer, Bambu Studio, Cura) and print as usual. With Object Mask enabled, the mesh from Replica is watertight and manifold — it should slice cleanly without repair.
Best for: single-color functional prints, figurines, replacement parts, props, architectural models.
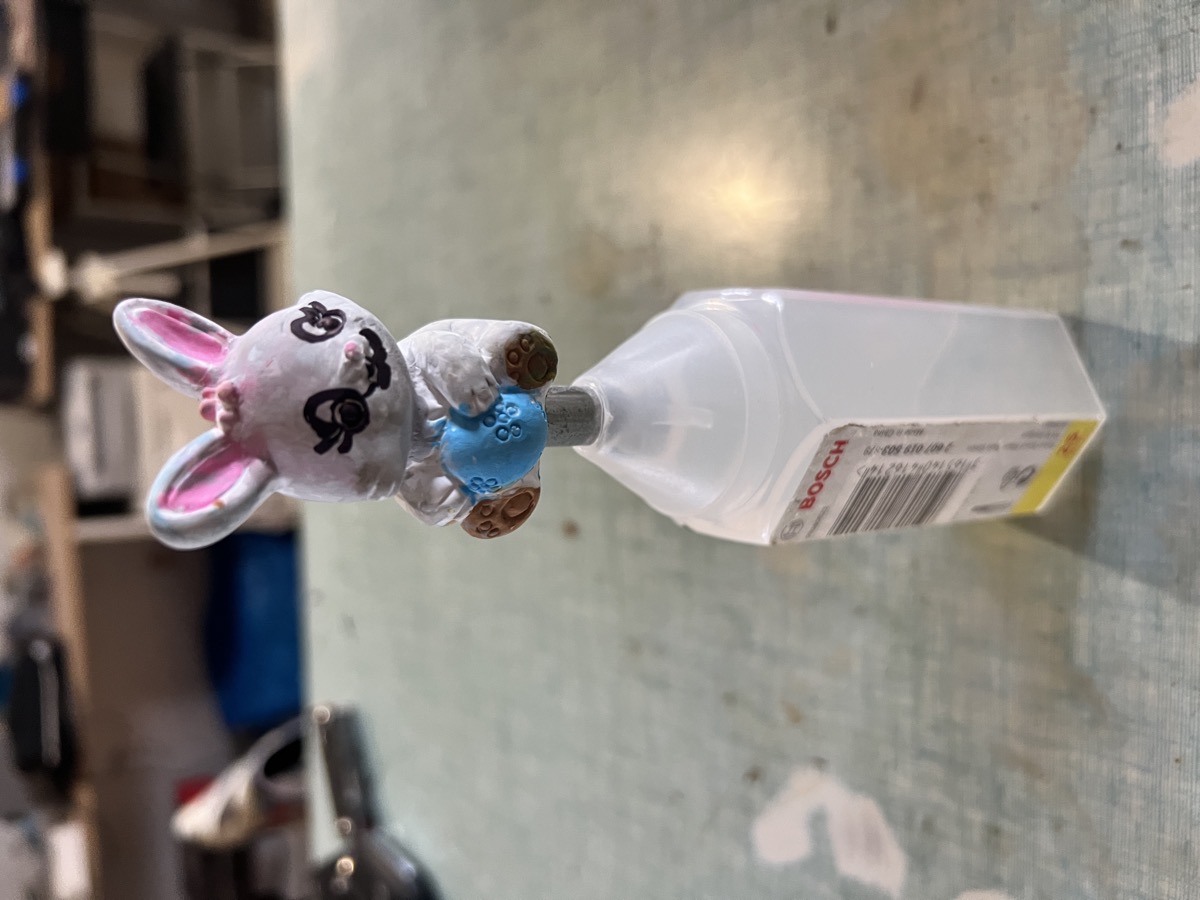
"Not exactly a professional use case, but here we go. My kids painted some Easter bunnies that fell and broke. I glued them back together, scanned them with Replica using quick iPhone shots — 67 and 48 photos, no tripod, no studio — then cleaned up the meshes in Blender and exported the STLs. The bunnies got a second life as 3D prints. The whole process, from capture to print, took less than an hour." — Ennio Pirolo, CEO Ambiens
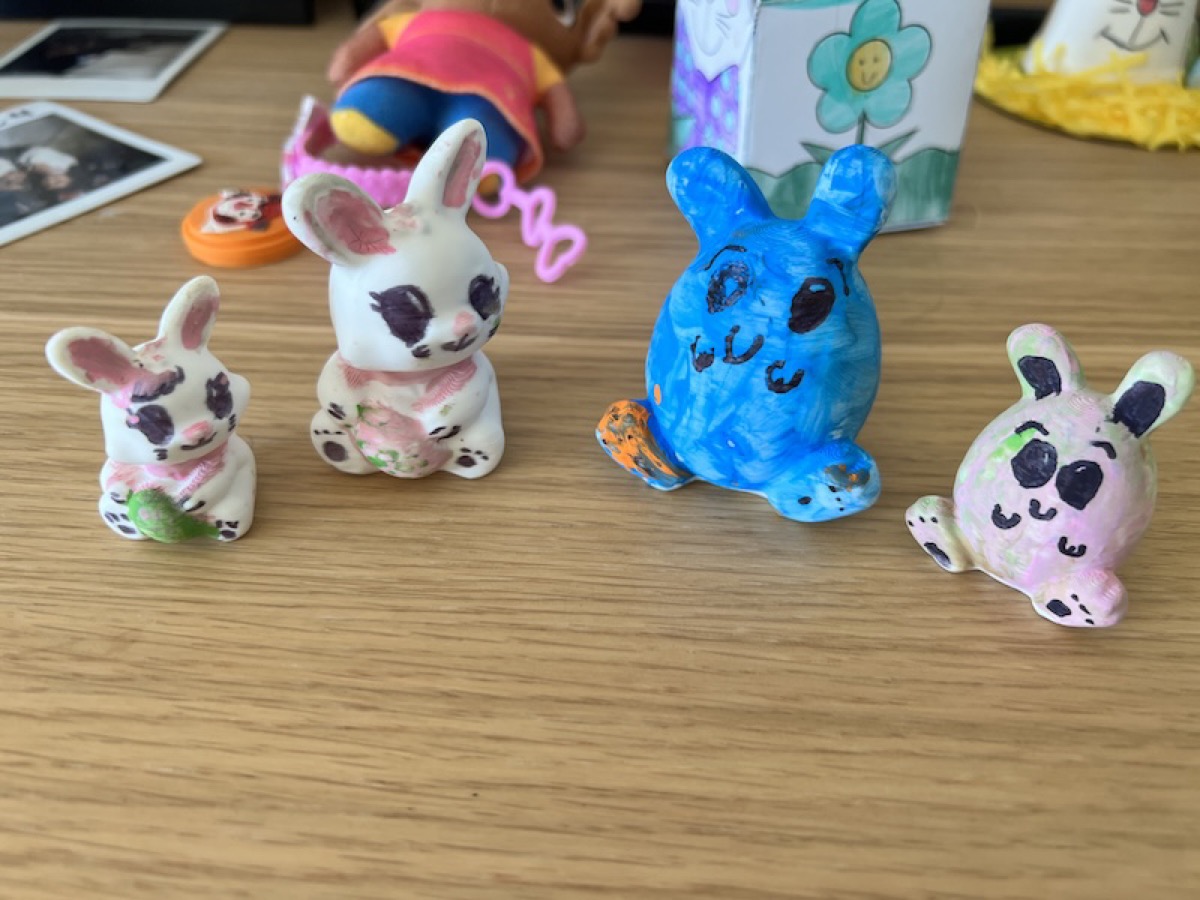 Copies of the two broken bunnies, 3D printed in matte white PLA at two different scales, and repainted by the kids.
You can download the full dataset with photos, Blender file, and print-ready STL.
Advanced Workflow: Photos to Multicolor 3MF via Blender
This is where it gets interesting. If you own a multicolor printer (Bambu Lab AMS, Prusa MMU, Palette) you can go from photographs to a full-color 3D print — with texture data baked directly into the 3MF file.
This workflow uses Chroma3MF, a Blender plugin developed by Ambiens specifically for converting textured 3D models into printer-ready multicolor 3MF files.
1. Capture and Process (same as above)
Follow the same capture and processing steps from the quick workflow. The difference comes at export time.
2. Export as GLB from Replica
Instead of STL, export as GLB:
- GLB preserves the full texture and material data from the photogrammetric reconstruction
- The mesh includes UV mapping and a high-resolution diffuse texture
- This is the format Blender imports natively
3. Import into Blender + Chroma3MF
Open Blender with Chroma3MF installed:
- Import the GLB file — the model arrives fully textured
- Inspect the mesh: clean up any artifacts if needed (Blender's sculpt/edit tools work well here)
- Run Chroma3MF — the plugin analyzes the texture and converts color regions into separate material zones
Chroma3MF handles the hard part: it segments the texture into a configurable number of filament colors (matching your available filaments), assigns each face to the closest color, and generates a standards-compliant 3MF file with per-face material assignments.
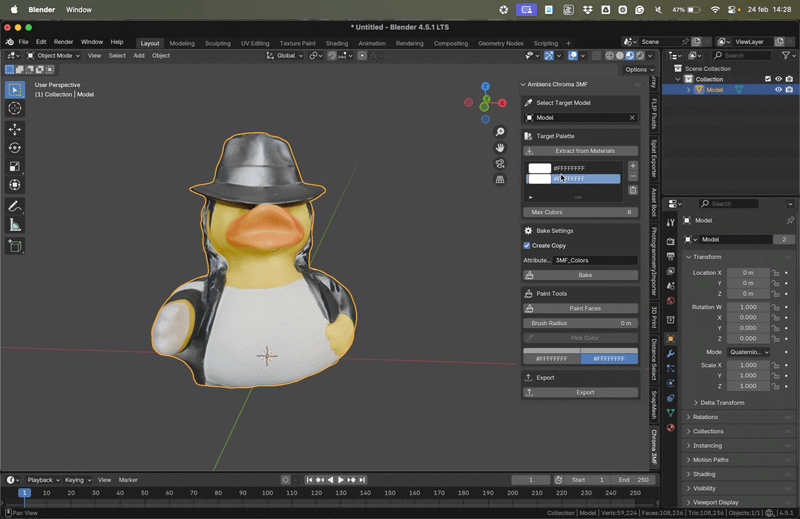
4. Configure Colors
In the Chroma3MF panel:
- Set the number of filament slots (e.g., 4 for Bambu AMS)
- Map colors to your physical filaments — the plugin shows a preview of the color assignment
- Adjust the color quantization threshold to fine-tune how texture detail maps to discrete filament colors
- Preview the result directly in Blender's viewport before exporting

5. Export 3MF and Print
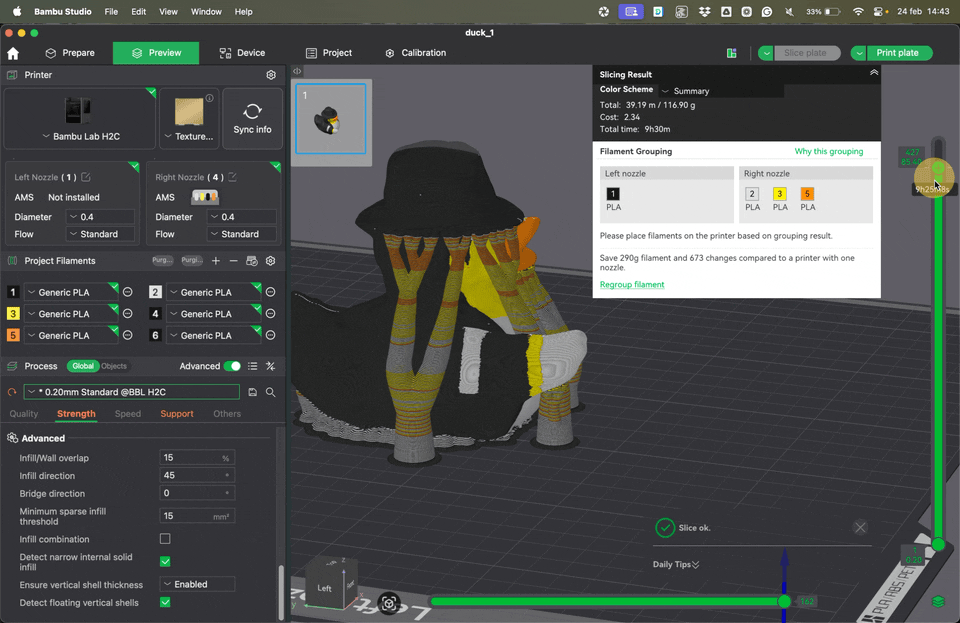
Export the 3MF from Chroma3MF. The file is ready for your slicer — open it in Bambu Studio, PrusaSlicer, or OrcaSlicer and the color assignments are already embedded.
Best for: art reproductions, painted figurines, heritage preservation, product prototypes with color accuracy, display pieces.
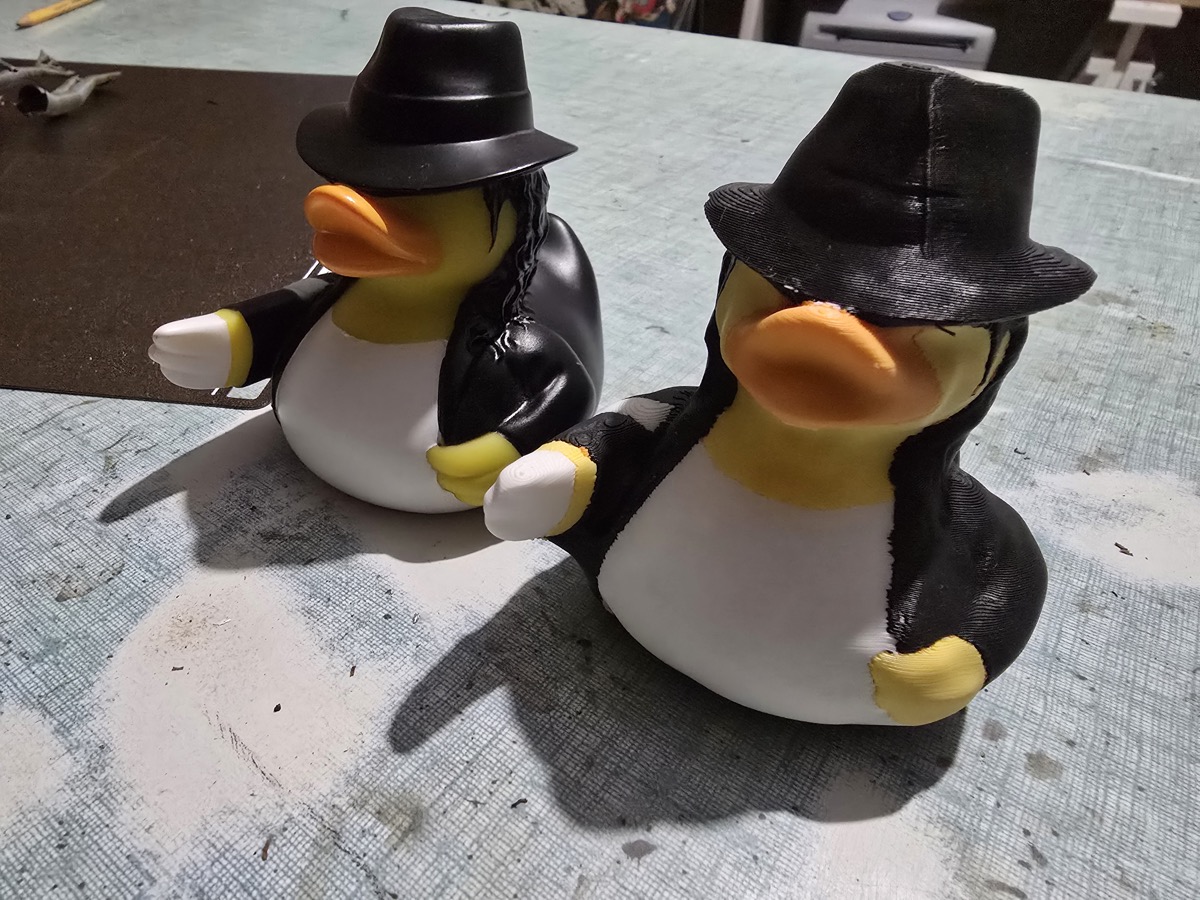
Real example: we scanned a rubber duck with iPhone photos and processed it through the full pipeline — Replica → GLB → Blender + Chroma3MF → multicolor 3MF. You can download the duck dataset with the original photos and the final Chroma3MF output.
Which Workflow Should You Choose?
| Quick (STL) | Advanced (3MF) | |
|---|---|---|
| Time | 30 min – 1 hour | 1 – 3 hours |
| Software | Replica only | Replica + Blender + Chroma3MF |
| Printer | Any FDM/SLA | Multicolor FDM (AMS, MMU, Palette) |
| Color | Single color | Up to 16 colors from texture |
| Best for | Functional parts, props | Art, display, heritage |
Both workflows start with the same Replica session. The difference is in what you do with the output.
Tips for Better 3D Prints from Photogrammetry
Capture matters most. The quality of your photos directly determines the quality of your mesh. Spend time on lighting and coverage.
Scale your model. Photogrammetry doesn't inherently know real-world scale. Measure one known dimension of the original object and set the scale in Replica before exporting.
Reduce before slicing. Photogrammetric meshes tend to be dense. For FDM printing, you rarely need more than 100K faces. Use Replica's mesh decimation or Blender's Decimate modifier.
Print orientation matters. Unlike models designed for printing, scanned meshes have no flat bottom. Consider where to place supports and which surface matters most for detail.
Free Datasets
Want to try before you shoot? Download these free photogrammetry datasets to explore the workflows hands-on:
- Appian Tomb — 116 photos of a Roman tomb on the Via Appia + 3D model output. A larger-scale outdoor scan.
- Easter Bunnies — Two small hand-painted objects, 67 and 48 iPhone photos each, plus Blender file and print-ready STL. Quick captures, no setup.
- Chroma3MF Duck — iPhone photos of a rubber duck + the full Chroma3MF multicolor output. End-to-end advanced workflow example.
Each dataset includes the original photos so you can see exactly how to frame your shots, and the processed output so you can inspect the results.
Get Started
Download Replica for macOS and start scanning. For multicolor workflows, grab Chroma3MF on Superhive Market.
Questions? Reach out at info@ambiensvr.com.